

Nightstands Ready for an Expedition
The American Black Walnut Campaign Floating Nightstands
We have a 2 year old and a new one on the way and I am compelled to do what they call nesting. I need to be allowed to craft a nest for my partner to whelp in. For real though, how weird would it be if your wife disappeared under the deck and build a nest to deliver a baby?
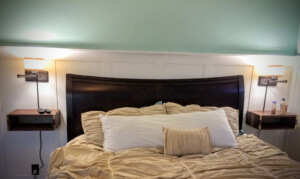
We already had the nursery and it was currently occupied with our 2 year old, so that was done so it was time to turn my attention to the bedroom. Wifey has spoken and the theme was English Colonial, I had already finished installing board and batten and a picture rail (I will tell you more about that in a future article, and how easy it was) and my talents or lack thereof at painting had already been employed. All that was left was nightstands, to catch all the crap that comes (literally and figuratively) with keeping a newborn in the bedroom with a bassinet.
Needless to say I had been watching excessive amount of The Wood
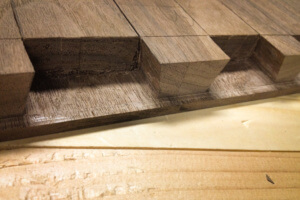
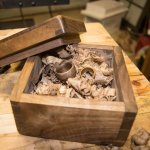
First attempt at the full blind dovetail pin board.
wrights Shop, as I always do. Is there really anything worth watching other than football are baseball that doesn’t improve your craft? When I came upon the campaign furniture episode featuring the masterful Chris Schwarz and the episode on Campaign Furniture and the art of the full blind dovetail.
The chest and full blind dovetails they used inspired me to push myself, and really put together a labor of love. In the modern wood working world with the 100s of joinery methods available too us the full blind dovetails are severely underutilized. I understand it, I mean it is not visible, it is not particularly easy to cut by hand (relative to through dovetails) and it is not really any better than a floating tenon in strength. But it you are building campaign furniture and you want to be historically accurate or if you just want the catharsis of a proper hand cut joint for practice, or simply appreciation of the hobby, there is not match for the hand cut full blind dovetail.
Unless you are batching out a 100 of these bad boys, hand cut is the way to go. It is great practice, and it is really not all that hard. It is great work on you chisel skills, your handsaw skills, and you could use it as an opportunity to practice your layout skills. It is such great practice because any mistakes you make (most of them anyway) will be hidden to everyone, this joint is just for you. The only people who will acknowledge the beauty of a full blind dovetail are you and the furniture conservator that may someday find your work, trust me i tried to convince my wife these were cool to many an eye roll. Fortunately this project came alongside the annual handtool sale at Aldi. Yes that Aldi, you may laugh, but Paul Sellers and I are all over these Aldi ash handle chisels they are comfortable to work with, reasonably well made, can be brought to a razor edge, and oh yeah they cost 5 bucks for a set.
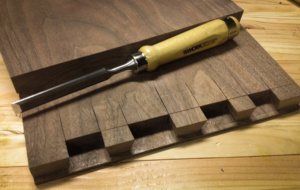
The best value in handtool woodworking, the Aldi Chisel.
I bought three this year and I will probably buy more next year to tune into a set of pairing chisels and skew chisels, and maybe try my hand at making one on Rob Cosman’s dovetail chisels.
Cutting the dovetails, pins first of course as The Schwarz suggests, is a breeze. There are several techniques for hogging out the waste, I tried using a forstner bit and cleaning up with a chisel, using a router and cleaning up with the chisel, and copying The Schwarz technique from the video but the easiest and cleanest way to clean out the waste was a modified version of Mark Spagnolo’s method of clearing out the pin board of a half blind dovetail.
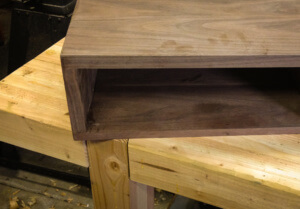
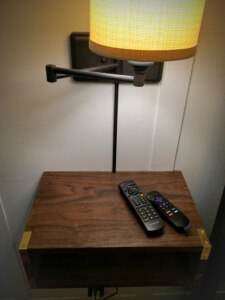
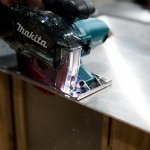
I finished the American Black Walnut with oil based Minwax Golden Pecan Wood Finish lightly applied and wiped off in two coats, I find this brings out some of the Mahogany notes in American Black Walnut to warm it up a bit. I then lightly sanded with 320 grit to knock the wood grain back down followed by three coats of Minwax Clear Satin Finnish Oil Based Polyurethane applied with a lint free rag, sanding between coats.
The Woodwright Shop also did a great episode on Fitting the Brass which has a great tutorial on how to mark up for brass corners and handles. Flush fit brass is way easier than they make it look if you just use a plunge router with a fine tipped bit and use the depth stop to set the depth. The chisel work Schwarz makes look so easy takes a lot of practice, a router and cleanup with a chisel makes quick work of it. The hardware they use of the project in the video as far as I could tell comes from Rockler, good campaign style hardware is hard to find. These and these are what I bought to complete the details.
I plan on adding drawers to these later, but I haven’t fount the right piece of figured walnut to really make them pop yet.
By Rick
Keep your tools sharp and your mind even sharper,
Wood.Work.LIFE.

The premier woodworking and lifestyle hub.


